How To Install Under Cabinet LED Lighting?
As a homeowner, we would always prefer to have adequate lighting in all parts of the house to prevent any slight mishaps or accidents that may occur.
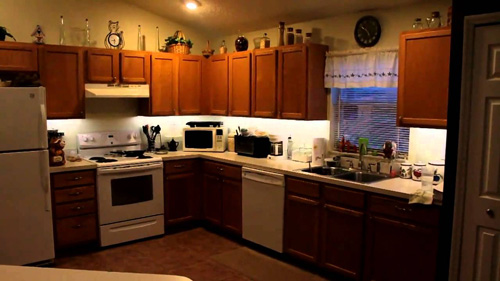
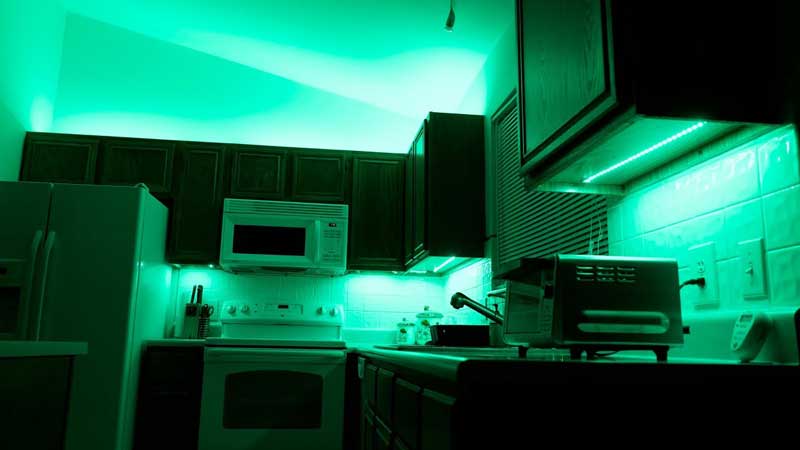
Installing an LED lighting to our cabinet is one, aside from achieving a sleek décor that matches its purpose and theme. Due to its aesthetic vibe, most household prefers to have one, or better yet, in every cabinet where they can insert it!
Since its demand in the market continues to increase, here are the following information regarding its usage, facts, and process of installment.
LED Lights: Information & Usage
As indicated, LED installation is done to have the wanted light fixture under the cabinet which results in light below its area. The most common installation of LED lights within the home premises is in the kitchen for counter tops under the cabinet. This is mostly used for food preparation.
Also, it is best to keep in mind that the voltage achieved by the transformer depends on the length of the lighting strip installed. Though, it is recommended to use a power supply that is greater than the actual current indication needed.
Also, for appearance, the power supply can be hidden in the cabinet with at least an inch or two from the edges of the storage to ensure proper heat distribution.
Lighting Effects
The quality and appearance of the LED installment depend on preference. Specifically, there are two types of installation strategy;
1. Even Distribution of Lighting
To achieve the kind of illumination, a single uncut LED strip should be installed. Specifically, it gives a gapless distribution within the light effect that gives uniform incandescence.
Bar lights can also be used which create smooth lighting evenly. The installation process is also straight forward with drive electronics that are known to be embedded to fixture.
Though, it is best to keep cautious within the usage of this type, as its breakage may result in mercury content which is known to be toxic, especially in the kitchen area.
2. Spot Illumination
To give the appearance of the puck or spot-like lighting which are mostly known for its dramatic aesthetic, cut the LED strip at every 3-inch length, and connect within the connector wires depending on your desired length.
The light under the pieces will appear brighter than those to the left and right of the strips. Aside from LED strips existing in the market, short cylindrical lights can be used that are typically 2 to 3 inches in diameter.
The light fixtures are mounted that can operate within being battery operated or plugs directly on an electrical outlet depending on what you want.
How Long Does It Last?
The LED lights can last depending on location and conditions existing. If ideal conditions are met, such as the absence of weathering or harsh environments, it can last for up to 6 years of usage or 50,000 hours.
With this, it is also known that the lifetime can extend especially for under cabinet installment or home lighting than those outdoors.
Benefits of LED Strip Installment
The benefits that you can have with the aim of installing these strips are the following;
Cost Efficient
With this, the lamp fixture within the ceiling is not done or used. This saves cost on the electric usage and process.

See Also: How To Cut And Solder LED Strips?
Since the installment directs the lighting to where it is expected, rather than wasting lights across the room, the task is done effectively with the accentuate benefit of direct light on the task needed to be done.
Aesthetics
It is widely known to improve the overall ambiance of the kitchen, aside from its direct usage in achieving the tasks done.
Having an aesthetically pleasing vibe can also increase the resale value, as it provides a design that is seemingly attractive to target guests. The bulbs are also not seen as it is under the selected cabinets.
11 Step Process of Installing Under Cabinet Lighting
1. Selecting The Lights And Power Supply Depending On Preference
For LED lights, you must first choose the desired brightness and color suitable in the setting of the installation process.
It is recommended to get the brighter lights than what is wanted but adding a dimmer contrast for control to compensate with unexpected occurrences wherein a brighter than needed illumination is necessary. The type of LED lights also depends on the lighting effect you have planned.
Furthermore, the power supply can be achieved by using a battery, plug into an electrical outlet, or by a transformer. It is also recommended to get a power supply that has an extra capacity of at least 20 percent load than required due to the uncertainty of the preference depending on the product.
2. Preparing Materials
To install the lighting, you must first ensure that the needed supplies are within reach. Specifically, you will need the following;
3. Checking The LED Function
Before installing the LED strip under your cabinet or counters, it is crucial to test the lights first to detect any defects. To do this, you need to lay out the LED lights as if creating a mock installation to ensure that every supply is present.
Then, unroll the views from its packaging and attach it from the power supply. All of the bulbs should light up, and if not, check for any loose or unconnected wiring.
Then, check if the brightness and layout are perfect for your application and wants. By the time that you are certain about the function and connection, the LED strip lighting acquired is correct.
4. Measuring The Area
Measure the under cabinet specifications where the LED strips are about to be installed. Then, cut the strips using scissors to have an initial preparation for the upcoming quick installation.
You should keep in mind that the strips have indicated marked lines wherein they can be cut, and is typically evenly spaced with at least three diodes. Failure to cut within these lines can lead to the failure of the selected diodes to light up, which in turn can delay the installation.
5. Attaching The LED Strip To The Power Supply
Before doing so, the length of low voltage extension wire should be extended by attaching it to the end of the first LED strip. To do this, strip at least an inch of the insulated wire from the wires at the end of the LED strip, and from the low voltage extension.
After that, wrap the exposed wires using electric tape or shrinker of the positive and negative cables, ensuring that both the charges are not connected. Use wire nuts to further secure the created connection.
6. LED Strip Connection
If the LED strip acquired does not meet the length of the under cabinet or is expected to have a 90-degree edge in between installation, connect two sections of LED light strips.
Either a solderless connector or soldering process connection can be done to attach this. Ensure that no exposed wire is present after the process to prevent any short circuit occurrences.
For solderless connector, keep in mind that the red and black colors of wire do not always indicate the positive and negative sides. Instead, look for the markings of the charges and associate it on the side of the strip.
7. Connecting Strips With The Strip To Strip No Wire Connectors
If the specifications require lighting with more than 16 feet, then the connection of two separate LED strips is needed. To acquire this, cut the strip to the marked line depending on preference, then peel back the cover.
Connect the length using the strip to strip no wire connector, ensuring the negative and positive charges are aligned as to what is needed.
8. Test The Strip Function
After the connection, it is essential to test the lighting to check if the desired illumination is set. Specifically, connect the strips temporarily and plug it into the power supply to see if all of the lights are switched on.
If the brightness expected is not met, check the connectors and see if it is firmly attached, especially the ones that are manually connected.
9. Installation of LED Strips
Wipe the counter and under the surface of the cabinet to ensure that the area is clean. Then, if it is within concrete or rough materials, an adhesive can be used. If not, the 3M can be used for flat surfaces.
Peel the protective cover on the adhesive backing of the LED strip, then apply it in a straight line where you want it to illuminate.
10. Dimming Capabilities
The lights can appear dimmer depending on preference. To mount the device, use hanging strips, and wire the power supply into the dimmer. You can also use a screwdriver to secure the mount.
11. Final Look
After the key points, turn on the lights to see the effect. This period can be seen as a fulfilling movement, as one turns on the dimmer to the brightest of the level. By doing so, the brightness wanted can be ensured to be achieved.
Bottom Line
Achieve the light design that you are looking for!
The aesthetics and beauty of the lighting effect depend on the preference of the homeowner. There are different approaches to the types of lighting preferred and it is essential to choose wisely depending on the setting and its purpose.
Lighting under the cabinets can be beneficial to certain tasks aside from achieving a sleek look that improves the overall interior. It is best to be careful regarding the fixtures and ensure it is firmly placed to prevent any further accidents.
Now that you know how to install the LED strips, approach wisely and attach it with outmost care!

