How To Cut And Solder LED Strips?
With the advancement of technology, LED lights have overtaken the world of electric appliances like a storm. The replacement done by these lights is merely remarkable.
This is a kind of prejudice that since the LED lights are very fancy, the credit is owed to their unique designs and they can be tough to function with.
Wait! It's a myth only. They are not just environmentally friendly but are also very easy going to work with.

In this article, I will be giving a demonstration on how to cut LED strips and then solder them. Here, I will be using conventional wires and provide a detailed idea on how to solder common wires on the LED strips.
Supplies You Will Be Needing
Before you proceed towards the process, let's have a look at the products that you will need to cut and solder the strips. Get your hands on these before you start;
Step 1
In the first step, you have to cut the LED strip to the desired length. An LED strip is always marked with segments. While reducing the strip, you need to make sure that you cut only pre-designed cut points.
Any strip that is not cut at these marks will not work to the fullest. Generally, for cutting process, wire cutters are preferred but if the LEDs are two placed too close, then scissors are to be used.
Step 2
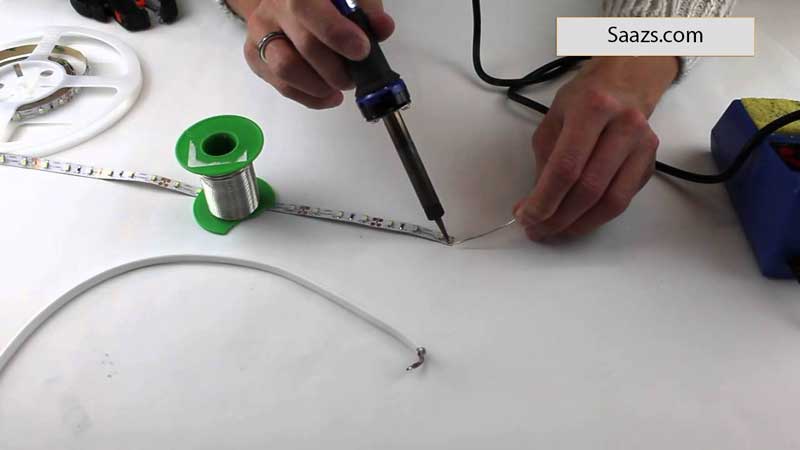
Take the wires and with the help of a wire cutter, remove a small amount of the insulating cable thus exposing a little part of the metal strands.
If the wire is a stranded one, all you need to do is to twist the ends of the wire together to avoid them from separating.
Step 3
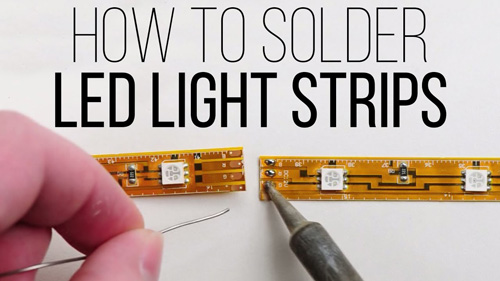
In this step, you will need to pre-tin the hard points of the LED strip and the endpoints of the wire that are the objects in question.
While soldering these points, you will have to use a soldering iron. There is a particular reason I am asking you to do so. Whenever you are about to apply the solder, you need to heat the element so that the solder sticks to it and not just lay temporarily and thus cools off.
Apply this much solder on to the mentioned points which are enough to cover them. While pre-tinning the hard points on the LED strips, you don't go beyond the hard points which can result in melting the strip.
Step 4
After both the hard points on the LED strip and the metal ends of the wire have been soldered, while placing the wire on the copper pads of the LED strip, it has to be soldered once again since it could have gone cold.
Mount the metal ends of the wire on the LED strip on the soldered area.
How To Solder Waterproof Strips?
You just got the idea of how to solder LED strips. Now making it more specific, let's have a look as for how to solder an LED strip if it's waterproof.
The procedure for soldering waterproof LED strip is almost similar to that of soldering the simple strips except here you have to cut the epoxy sealant before applying to solder to the hard points of the strip.
Once the process is complete, the silicon sealant is to be put back to waterproof the area that was exposed earlier.
Step 1
In the first step, you have to identify the cut point along the strip. For this, you have to take help of scissors graphics. The strip is always segmented. So use the printed line as a reference.
Step 2
You have to cut the epoxy sealant now from a little portion over the top end. This sealant serves as making the LED strip waterproof. While reducing the epoxy sealant, make sure you never cut the conducting wire as it will ruin the whole LED light.
Step 3
In step 3, peel off the adhesive from the copper pads situated on the bottom side of the strip. After you have freed the pads from any adhesive materials, this end will be the top end when you once again solder them.
Step 4
It's about the time when you will pre-tin the ends that are to be brought in contact with each other once the strips are placed one above the other. Once you set the non-tinned strip over the tinned one, apply heat.
The heat should be moderate one enough to melt the solder.
Once again, for good measure, extra solder is added to the top pads.
Step 5
Now, you have to reseal the strip and make it waterproof since this little portion was peeled off and the epoxy sealant was removed.
Apply silicone sealant directly to the strip. While applying, make sure you cover all the conducting traces on the strip as to make it waterproof.
The strip has to be kept for about 2-3 hours so that it can get dry.
And this is how waterproof LED light strip is soldered.
Bottom Line
After going into a detailed account as for how to solder LED lights, we get the idea that soldering the LED lights is an easy technique, but you need to be super careful and cautious with the strip and other instruments.
For instance, while working with soldering iron, one has to be careful that any other area beyond the copper pads does not get heated as it will heat the conductor thus damaging it.
Similarly, when cutting the epoxy sealant while soldering the waterproof LED lights, be careful with the conducting area. If this gets cut off, the whole strip is ruined.

