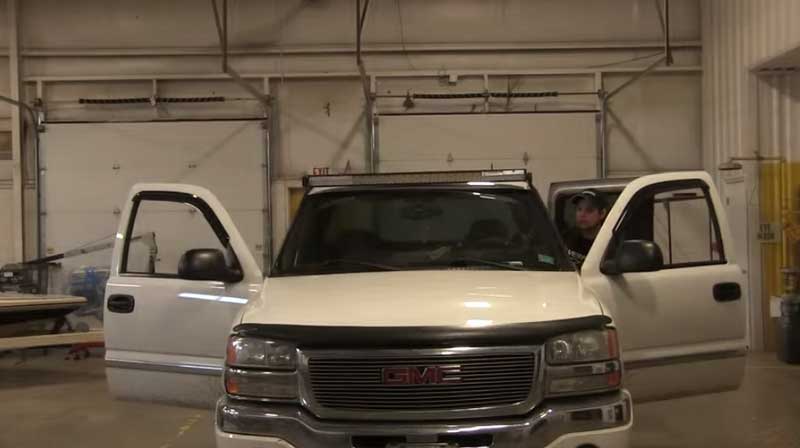
How Do I Install LED Light Bar On Roof?
LED light bars are very trendy when it comes to remodeling your car. And remodeling can be done on different vehicles.
A recent trend is installing the light bar on the roof of the car. This looks beautiful after the installation because the light spreading from the LED increases the overall attraction. The installation process is different for individual car models.
Nowadays, owners are posting videos online about installing LED light bar on the roof. These are trending worldwide and are helping many enthusiastic people who are planning on customizing their car.
Installing LED Light Bar On Roof
If you are experienced in this type of projects, you will not take much time to get the job done. On the other hand, if you are new to this project, the work will be a bit tough for you initially.
You can hire a professional and get it installed at your desired time. Unfortunately, this option will cost you a lot and possibly will exceed your budget if you intend to finish it with minimum cost.
To avoid this, the ways you can install LED light bar on the roof are provided in this article. Follow it to know the complete guide about the installation.
Know Your Budget
Check your budget before going for the installation. Your budget will determine when the project will be finished. If you have a minimum budget, be mentally prepared that you have to do it by yourself.
Take advice from professionals and understand the wiring connections and what tools to work with. It is essential because, without proper knowledge, you might damage the light bar and even harm yourself.
This will add more money to your damage. If your budget is reasonable and you are not interested in doing it by yourself because of the wiring connections and other stuff, contact with a professional.
They will come by your place and will finish it before you even expect.
Tools And Electrical Devices To Use
For tools, get a screwdriver, pliers and wrenches, electrical and measuring tapes, wire strippers, crimpers, drill and drill bits and a marker for the drilled holes.
Use a wire cutter to cut the wire according to the size. For drilling, make sure to use the right drill bits as using the wrong one will damage your vehicle.
For electrical devices; get fuses, a relay switch, mounting brackets and most importantly, wires. A fuse is used to block the excess flow of current. If the current is huge, the fuse breaks itself by blocking it.
A relay switch is used to control the large current or voltage in large amount. Mounting brackets are used for fitting the light bars securely.
The Installation Process
After getting the product, first, check and test it. Test the bar to make sure whether it is working correctly or not. You can do this by connecting it with a battery.
LED light bar has 2 wires, a red and a black one. Connect the red one to the positive terminal of the battery and the black one to the negative terminal. If the light works properly, that’s great.
If you are seeing the light getting dimmer or showing other problem, contact the manufacturer.
Clean The Roof
Clean the whole place where the installation will take place. Use a cloth or other wiping tools for this purpose. If the roof contains some permanent stains, apply some stain remover and clean it properly.
Do The Drilling
Measure the place where you will do the drilling. The measurement should be accurate according to the length of the bar, or else, you will end up with some additional holes which will make the roof look awful.
The drilling will create flying debris everywhere so make sure to wear goggles.
Lock The Mounting Brackets And Light Bar To The Roof
Place the mounting brackets onto the roof and insert it into the drilled holes. Lock it with screws. Check the brackets adjustments after screwing. Then fix the lights to the mounting brackets with screws.
The lights should be fixed appropriately with the bar, or else, it might fall off while you drive. Be aware of this step.
Wire It Securely
Now, comes the critical part. Make a connection between the light and the relay switch. The switch will maintain the flow of current on the light bars. Take the red wire of the light and join it with the red wire of the switch.
The joining can be done by soldering. For safety purpose, wrap the soldering portion with electrical tape. Now, make a connection between the relay switch and the battery of the car.
As the car battery supplies DC voltages, a fuse must be placed between the switch and the battery in case the current is overflowed. The reason for the use of fuse is already mentioned.
Now, connect the soldered red wire to the positive terminal of the battery and the black to the negative terminal.
Tips: Learn more about "how to wire led bar?"
Light It Up
You are finished from drilling to the wiring connections. It is time for you to see the results. Turn on the switch and enjoy the brightness of the LED lights. The lights should spread correctly according to your desire.
Safety Precautions
Do not cut yourself while cutting the wires. Wear protective gloves for safety.
While fixing the mounting brackets and light bars on the roof, keep your balance properly. Do not lose your balance as the brackets and bars will fall to the ground creating additional damages for you.
While checking the light bar in the beginning, always connect it with DC current to avoid light damages.
Always remove the black wire connected to the negative terminal first after checking. If you do the opposite, the battery will be heated up enormously causing it to short out. This can damage the battery.
Conclusion
This article will be a must need if you are up for installing LED light bar on the roof by yourself. Maintain the steps properly and safely.
Be smart and strategic.

